If you’re someone who enjoys spending time outdoors, or even if you just want to add a touch of charm to your backyard, then building a folding Adirondack chair is the perfect Saturday morning project. These chairs are not only comfortable but also have a classic design that will never go out of style. Don’t worry if you’re not a woodworking expert – we’ve got you covered with this easy-to-follow guide. So, grab your tools and let’s get started!
Adirondack Chair Plans
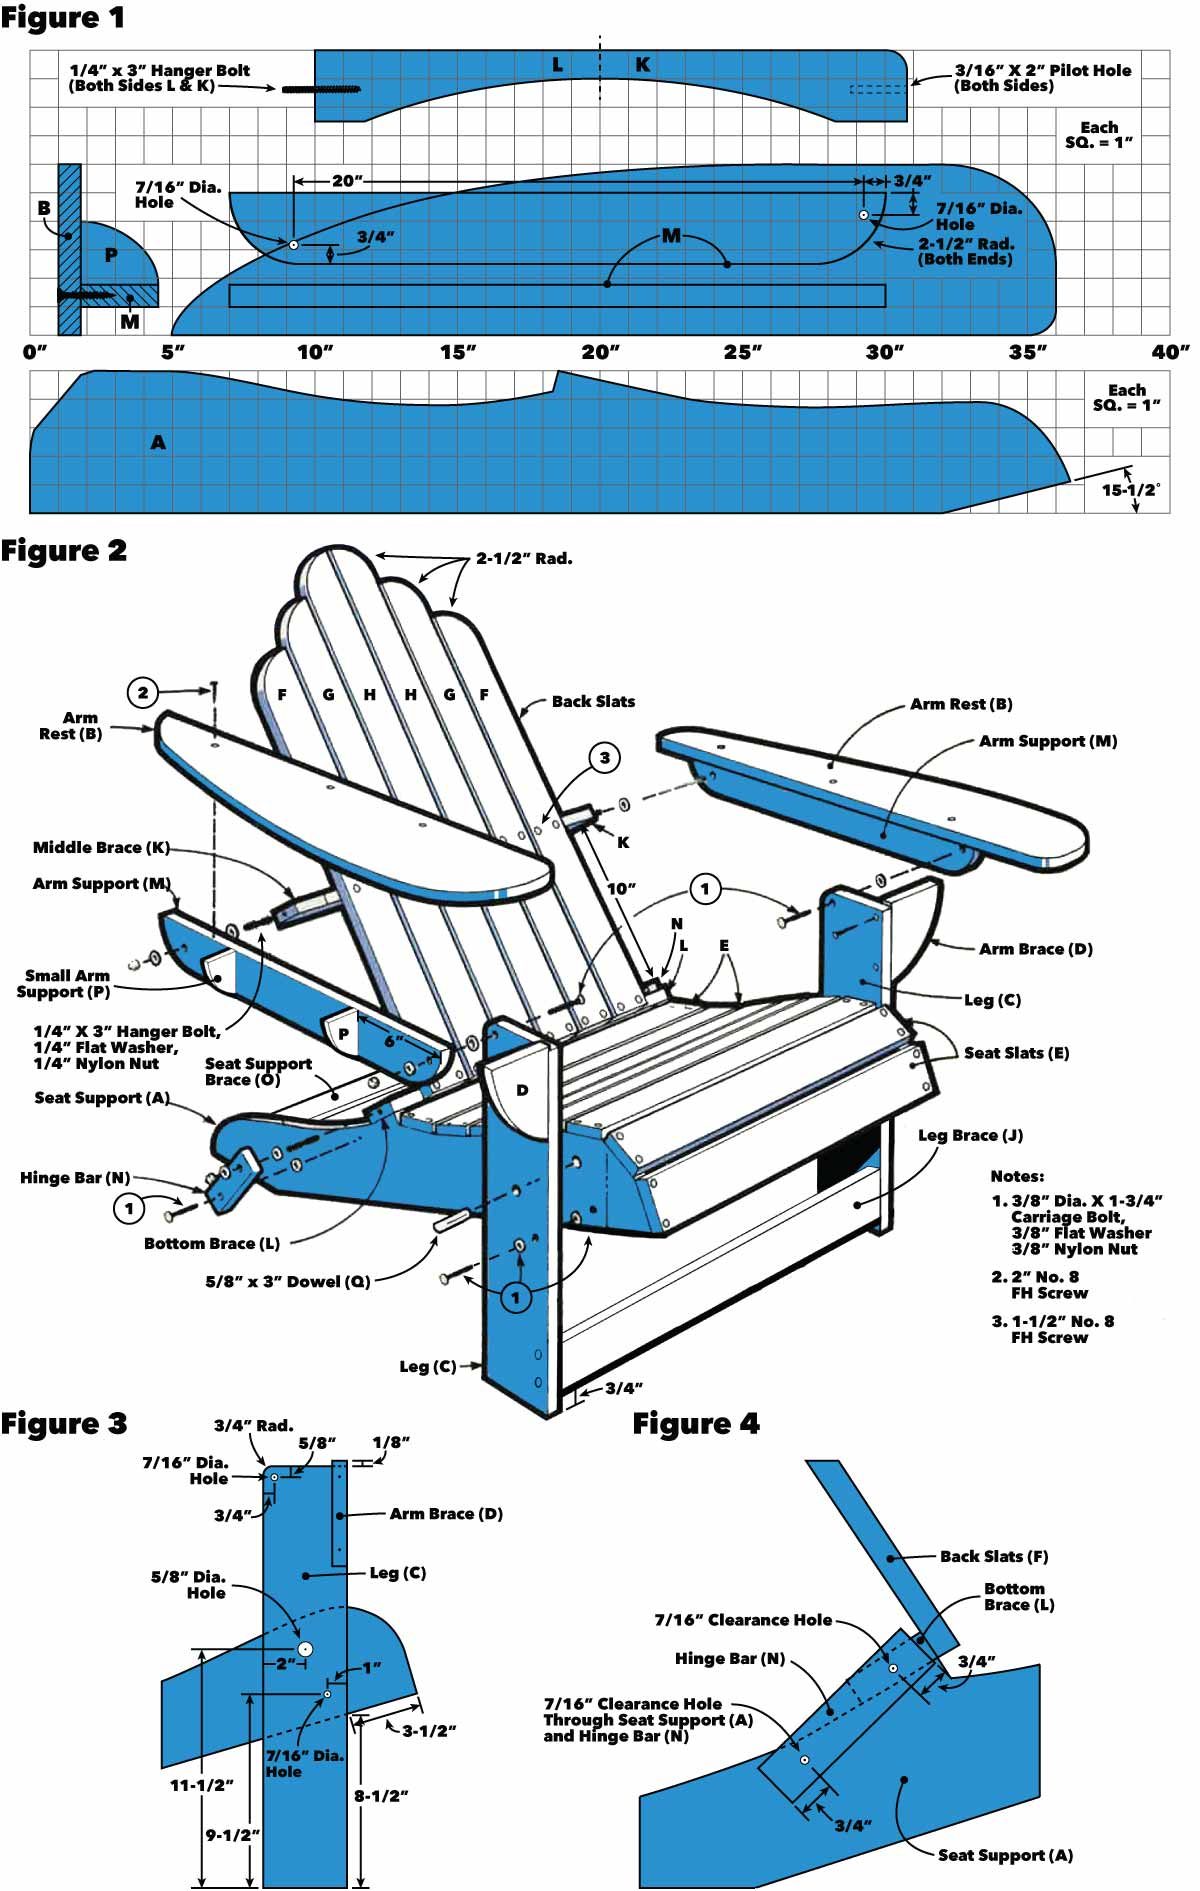
The first thing you’ll need are some Adirondack chair plans. Luckily, we found some free PDF plans that will make your life a whole lot easier. You can find them on websites like Family Handyman, Popular Mechanics, and Bangkok Foodie Tour. These plans will provide you with step-by-step instructions, as well as a list of materials and tools you’ll need.
 One of the key features of the folding Adirondack chair is its portability. Unlike traditional Adirondack chairs, which are quite bulky, the folding ones can be easily stored away when not in use. This makes them ideal for small spaces or for those who like to switch up their outdoor furniture.
Woodworking Tips
If you’re new to woodworking, don’t worry! We have some helpful tips to ensure your chair turns out perfectly. First, make sure you choose the right type of wood. Cedar is a great option because it’s durable and weather-resistant. Second, take your time to measure and cut the pieces accurately. Precision is key to ensuring a snug fit. Lastly, don’t forget to sand and varnish the wood for a smooth and polished finish.
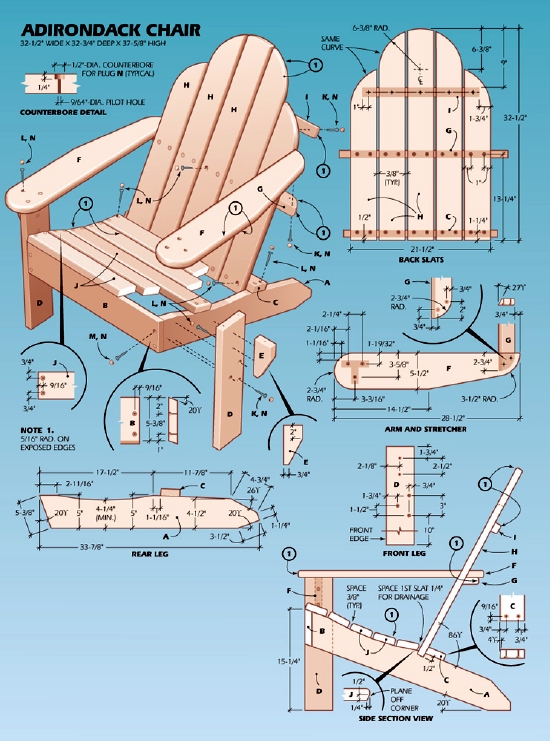 Now that you have all your materials and plans ready, it’s time to start building. Begin by assembling the backrest, armrests, and seat. These are the main components of the chair and will determine its overall comfort. Once you have these pieces ready, you can start attaching the legs and supports. Make sure everything is secure and sturdy before moving on.
Finishing Touches
To add a personal touch to your Adirondack chair, you can paint or stain it in any color you like. You can also add cushions for extra comfort or even carve decorative patterns on the wood. The possibilities are endless when it comes to customizing your chair.
 Now that you’ve built your very own Adirondack chair, it’s time to sit back, relax, and enjoy the fruits of your labor. Whether you’re reading a book, sipping a cold drink, or simply taking in the beauty of nature, your chair will provide a comfortable and stylish seat.
Conclusion
Building a folding Adirondack chair is not only a fun and fulfilling project, but it also allows you to create a piece of furniture that you’ll cherish for years to come. With the right plans, materials, and woodworking techniques, you’ll have a chair that not only looks great but also stands the test of time. So, gather your tools and get ready to embark on a DIY adventure!
/yellawood-free-adirondack-chair-plans-5a0b0b8cb39d03003793f895.jpg) Remember, building your own Adirondack chair is a rewarding experience that allows you to unleash your creativity and showcase your woodworking skills. So why wait? Start planning your next weekend project and get ready to enjoy the great outdoors in style!
Remember, building your own Adirondack chair is a rewarding experience that allows you to unleash your creativity and showcase your woodworking skills. So why wait? Start planning your next weekend project and get ready to enjoy the great outdoors in style!